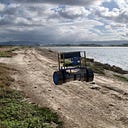
In this blog I will give an in depth guide of the physical assembly of Steven. Firstly I unboxed all the components and laid them out in a manner where all the hardware was easily accessible throughout the assembly process. As with all assemblies organisation is key and a tidy workspace is integral to this organisation
I then consulted the in depth step by step assembly instructions provided with the robot. From previous experience I have found following the instructions saves you so much time in the long run.
Firstly motor brackets had to be connected to the aluminium base plate. The base plate is drilled in a manner that the top and bottom sides are arbitrary. This allows the assembly to be easier. The bracket sides are also arbitrary. it is just important to make sure that you have attached it through the correct holes otherwise the robot will not balance.
Next the motors were attached to the brackets. The motors are dual direction motors meaning that they can go both clockwise and anti-clockwise this means that the motors can be put on either side of the robot. The orientation of the spindle relative to the bottom of the bracket is important and the four holes that should be used are specified in the instructions
Next the perspex tray that is used to allow the robot to be in a resting position is added this process requires 4 screws and 2 spacers
Then the control board was assembled and attached to the base plate using a combination of screws and spacers.
The rest of the process was quite simple. Each tier of the robot was added using spacers and screws with the power supply being attached to the middle plate.
I then spent time carefully tucking the wires through the hardware of the robot as then there were no loose wires that could get caught while the robot is preforming tasks.
It was then time to test its functionality
In order to complete the robot project I will write source code to allow it to navigate an obstacle course that has been designed to test the robot. I will update you further when this has been completed.
Updates on further projects will soon follow
